How to Make a QR Menu: A Step-by-Step Guide for Restaurants
Creating a QR menu is easier than it sounds. This step-by-step guide covers adding categories, uploading item photos and descriptions, updating prices, translating the menu into several languages and printing the QR codes for your tables. Whether you run a restaurant, cafe or bar, your first digital menu can be live in about 30 minutes.
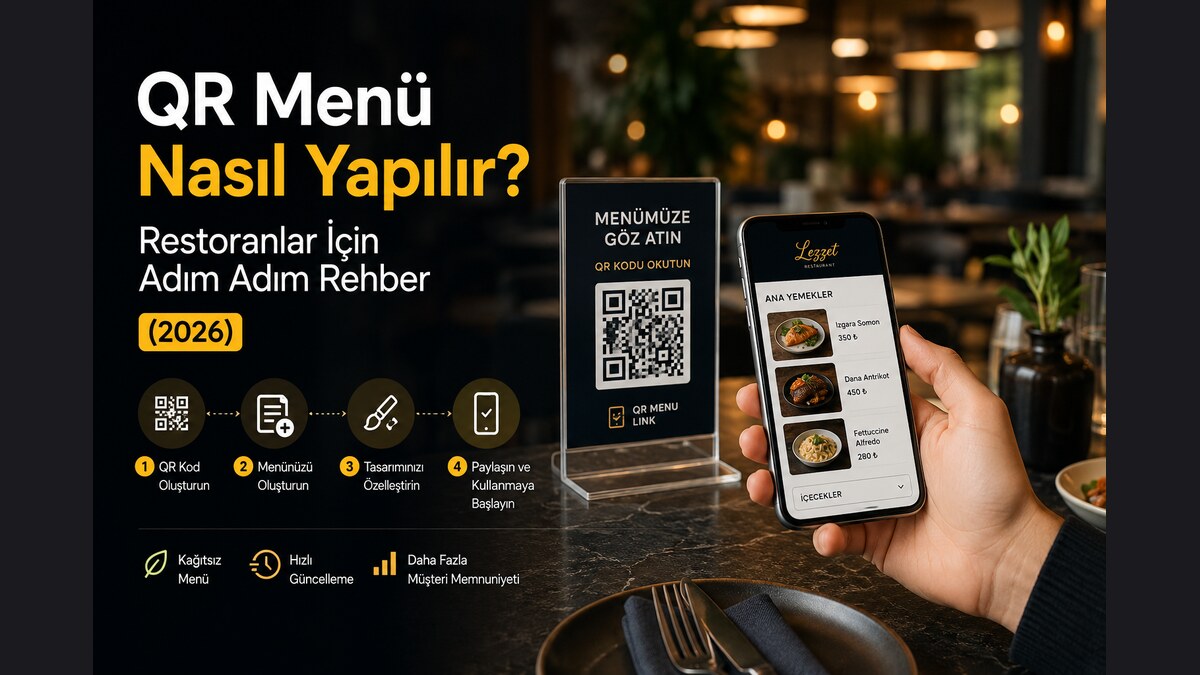
A QR-code digital menu lets your guests scan a square with their phone at the table and instantly see your restaurant's menu. Compared with a printed menu it is far more flexible, hygienic and always up to date. Creating your first QR menu takes less than an hour.
In this guide we walk through the seven steps that take you from scratch to a live QR menu. The steps described here apply to QR Menu Link, but the same logic works on most digital menu platforms.
What to prepare before you start
- Your restaurant's name, logo (if you have one) and social media links
- Your menu's category headings (breakfasts, salads, main courses, drinks, etc.)
- For each item: a name, short description, price and, if possible, a photo
- If you want to support multiple languages, a translation plan for the main foreign languages (English, German, Russian, and so on)
Not having photos is no problem; you can add them later or use the AI-powered image generation feature. Get the structure in place first, then enrich it.
Step 1: Create an account
First you need to open a free restaurant account. You can sign up with your email and password on the registration page. We don't ask for card details, and all core features are free for the first six months.
Step 2: Enter your restaurant details
In the admin panel, start by entering your restaurant's basic information: name, slug (the short form that appears in the URL), welcome message and social media links. Choose your slug carefully — it becomes the URL your customers will see (for example qrmenulink.net/your-restaurant/menu).
Step 3: Add your categories
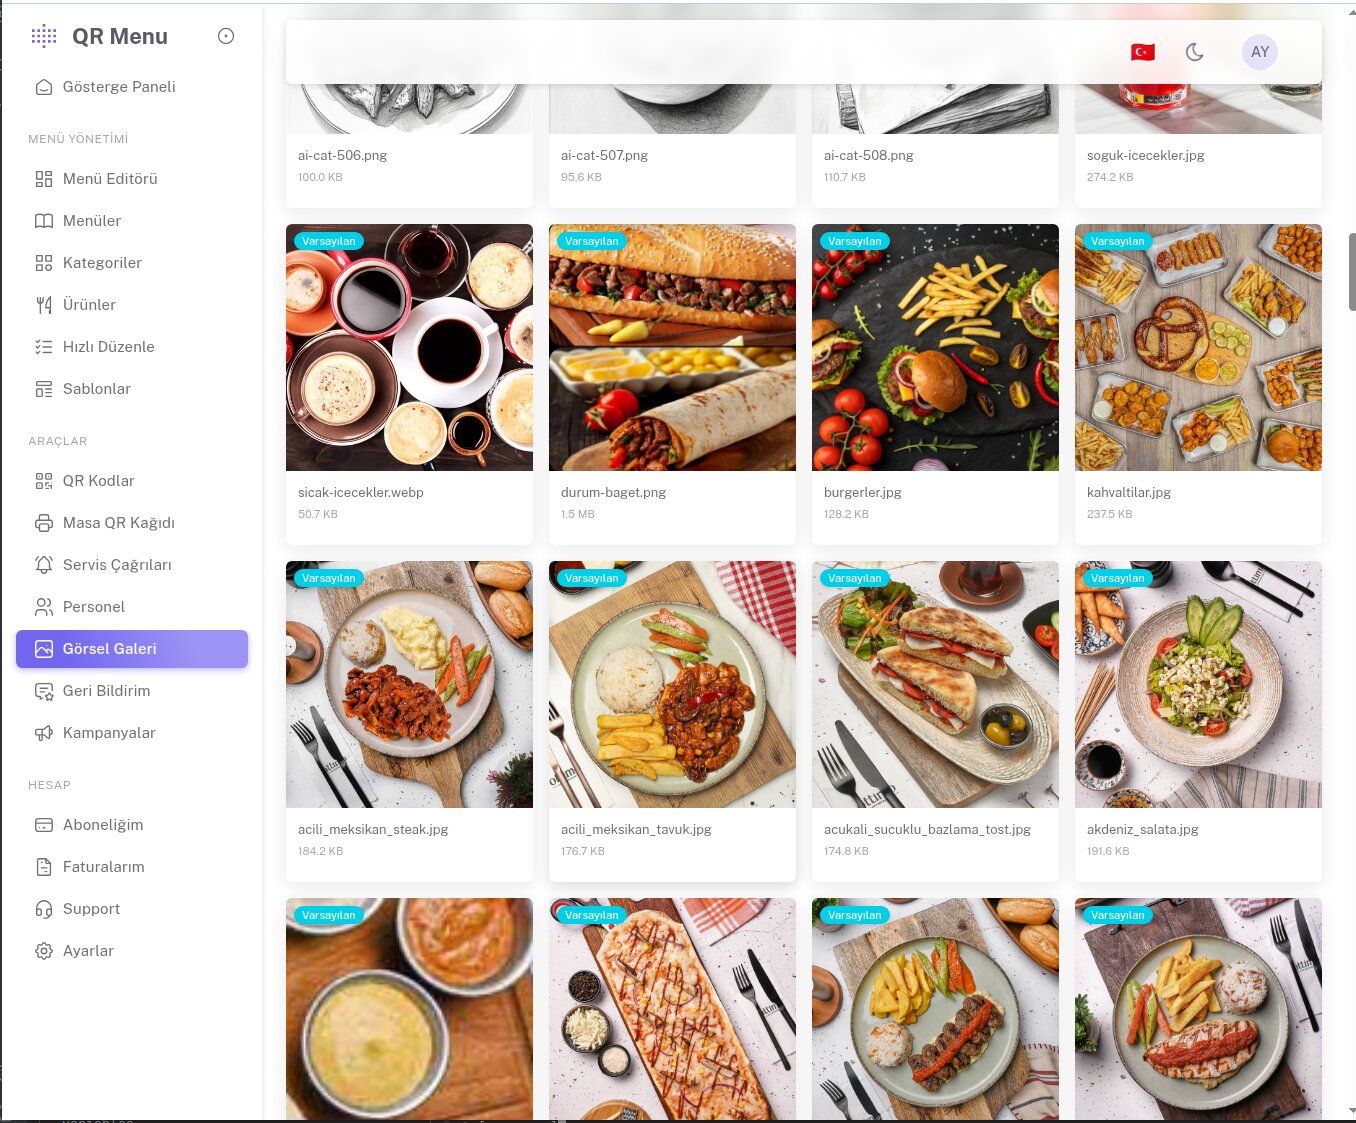
Split your menu into logical categories: breakfasts, starters, main courses, desserts, hot drinks, cold drinks and so on. You can add an image to each category; depending on the template you choose, it appears as a cover image or in the grid cells. If you don't have an image, you can pick one from the platform's free image gallery.
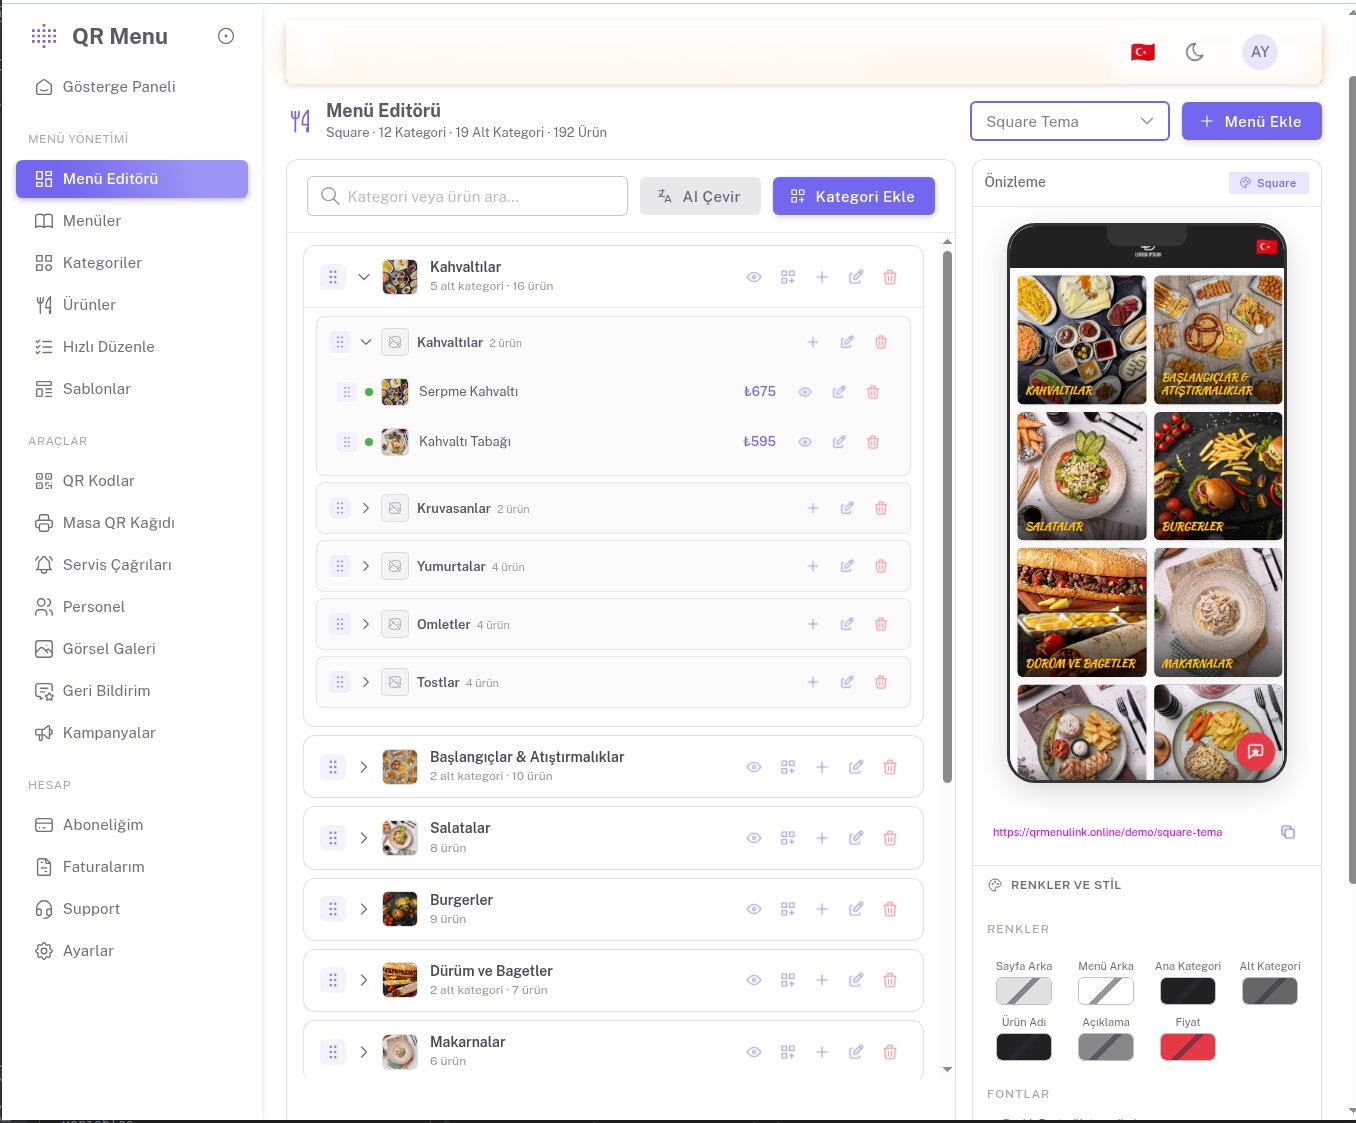
Tip: more than 30 categories will confuse your customers. Try to stay between 8 and 15 categories where possible; using subcategories gives a cleaner experience.
Step 4: Add your items
Add items to each category one by one. The fields you need to fill in for each item are:
- Name — short and clear (Spicy Adana Kebab, Cappuccino)
- Description — 1–2 sentences, written to whet the customer's appetite
- Price — if there are variants (small/large) you can add them separately
- Image — high resolution, shot from above or at a 45° angle
- Allergen and diet labels — vegetarian, gluten-free, contains nuts, etc.
If you struggle to write descriptions, you can use the AI assistant — it generates a short, appetizing description from the item name. In the same way, one-click AI translation is available to translate all your descriptions into English, German or another language.
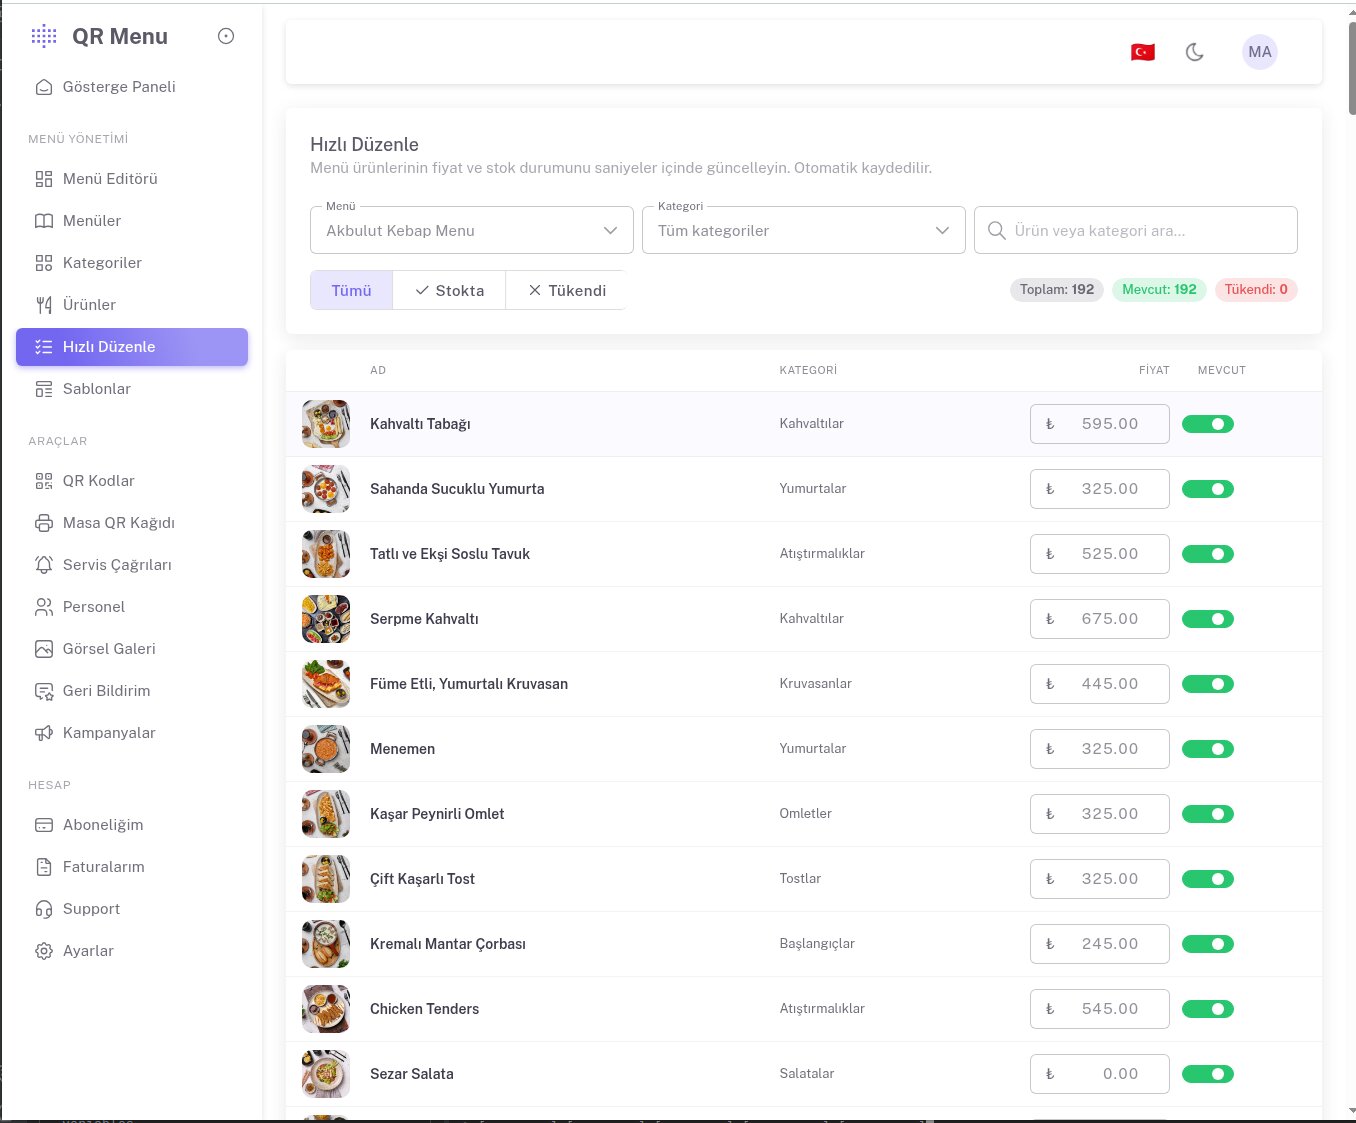
To quickly update prices and stock status later, you can use the Quick Edit screen — you see the whole menu on a single page and change it instantly:
Step 5: Choose a template
The template determines the visual design your customers see. In the template gallery you can review 13 ready-made designs and visit their live demos. For breakfast spots and cafés, Cafe Banner or Fast Cafe; for upscale restaurants, Premium Gold; and for cocktail bars, Bar & Cocktails are recommended starting points.
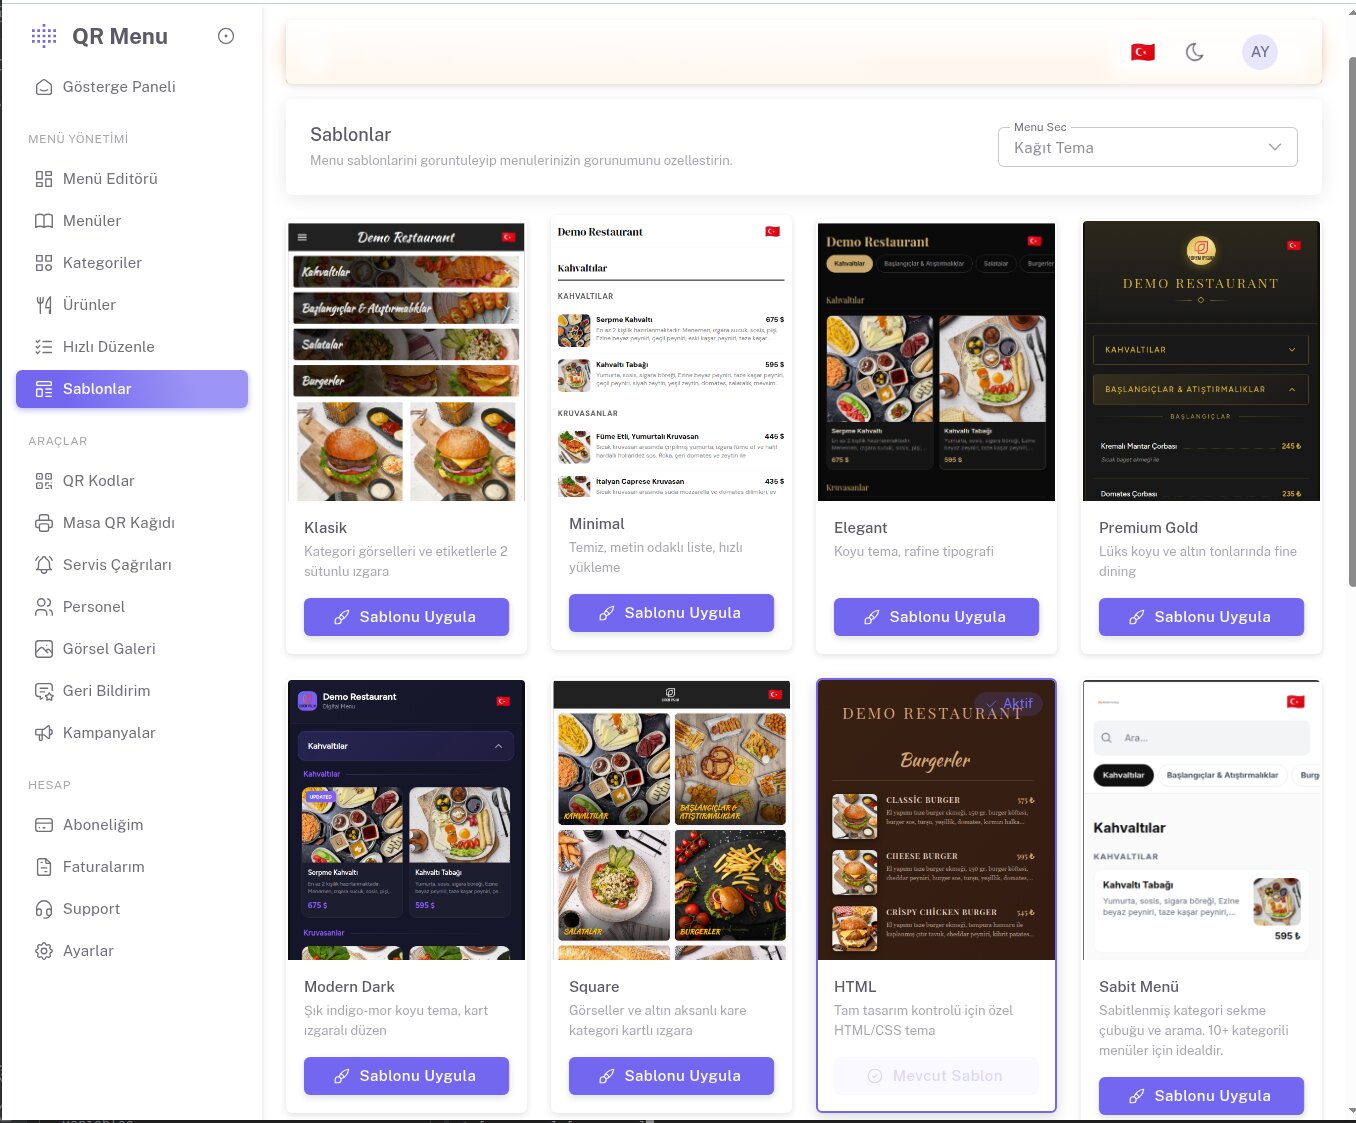
Step 6: Customize colors and fonts
Once you've picked a template, you can match the color palette and typeface to your restaurant's brand identity. Page background, menu background, category heading, item name, price — each can be set individually. If your restaurant's logo has a gold tone, set the main category color to that gold value; the menu will look coordinated with that color from start to finish.
Step 7: Download the QR code and place it on the tables
The QR code for your menu is generated automatically. You can download and print it from the admin panel as a high-resolution PNG or PDF. If you want a separate QR code per table (for per-table analytics), table-numbered variants can be generated too.
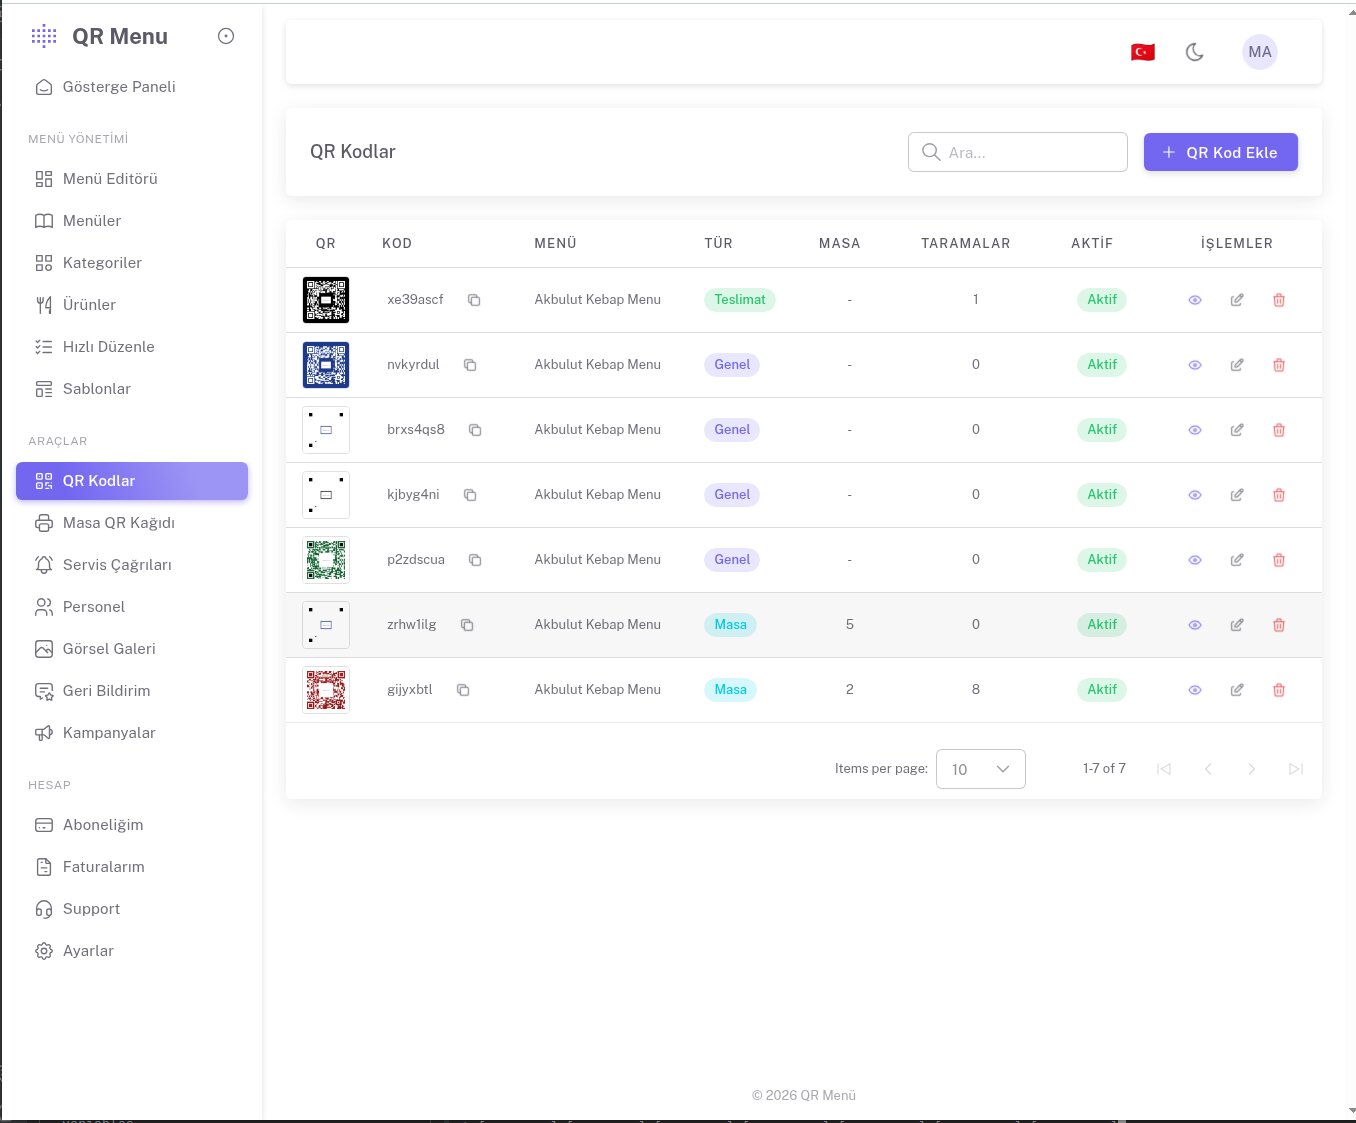
You can place the QR code on the table laminated or mounted on a small wooden stand. For a more elegant look, you can use the platform's Table QR Sheet Designer — it creates a printable QR stand in A5, A6, Square or Wide sizes with café-themed background patterns.
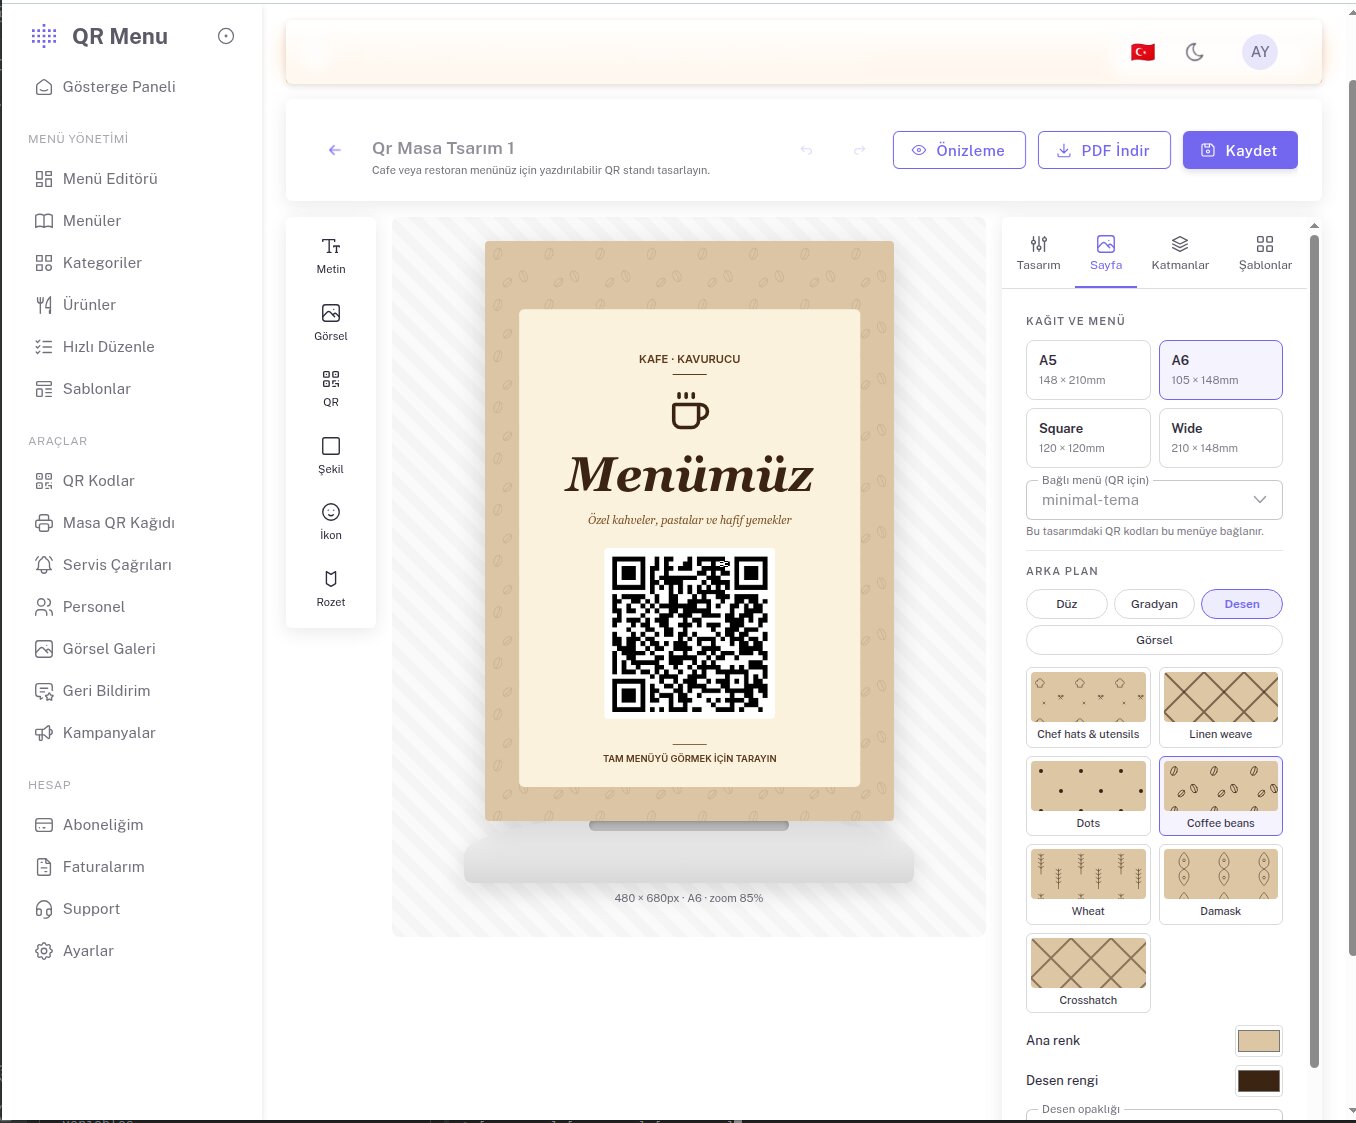
After setup: tracking and quick settings
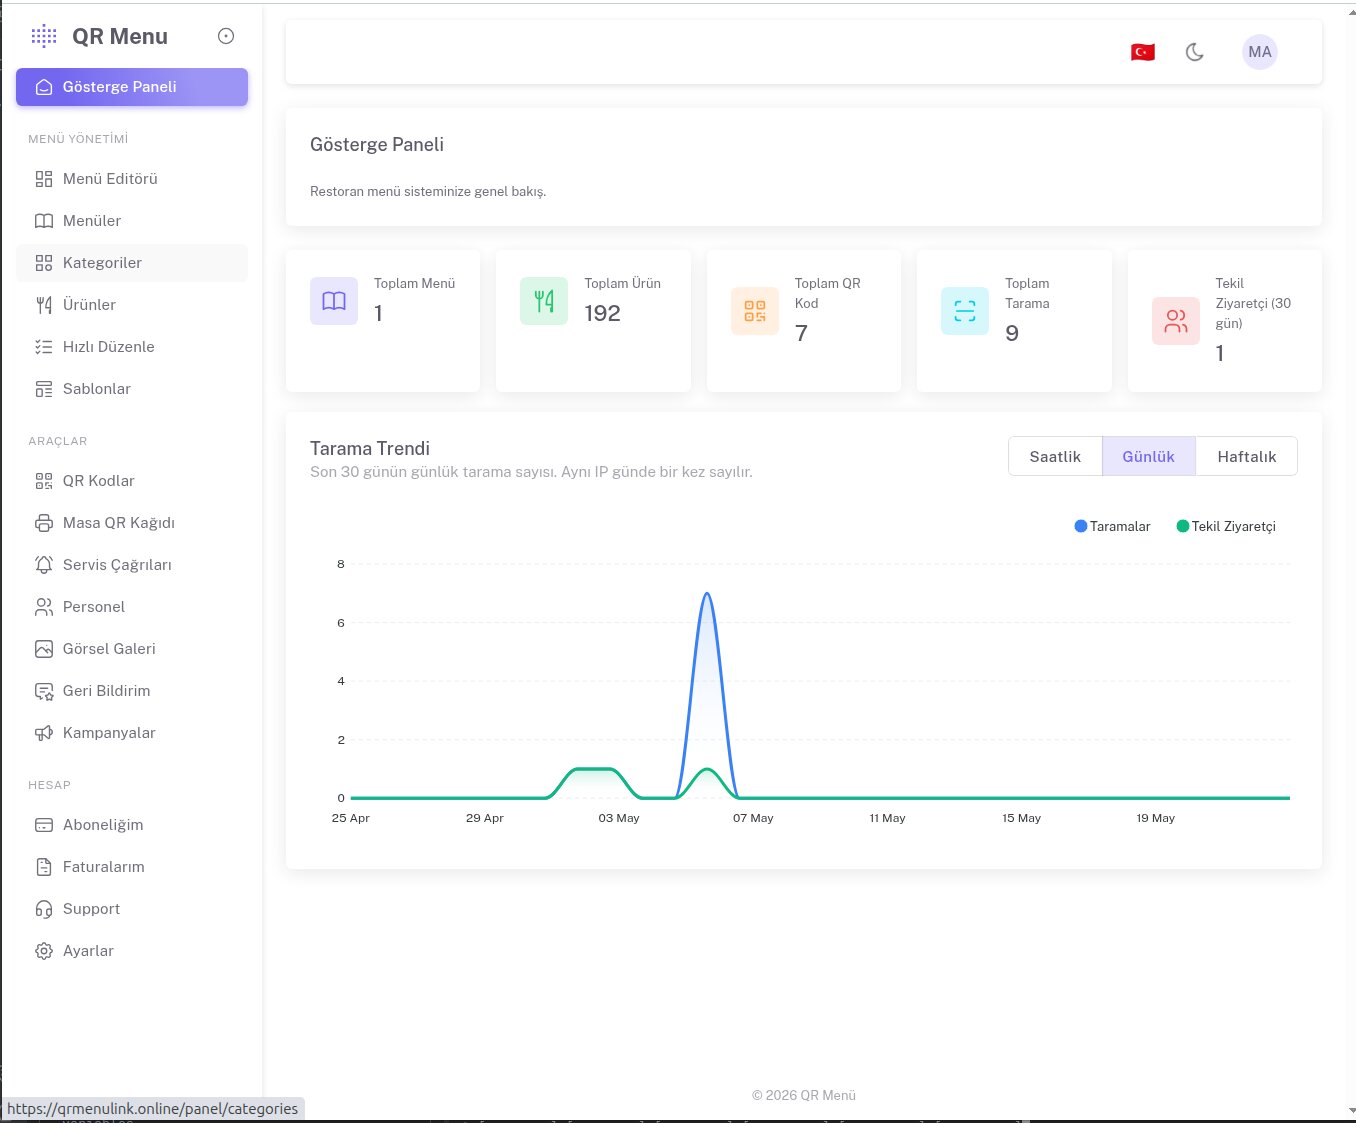
Once your menu is live, there are two important screens you can track in the panel. The Dashboard shows the scan trend for the last 30 days, the number of unique visitors and the total item/menu counts:
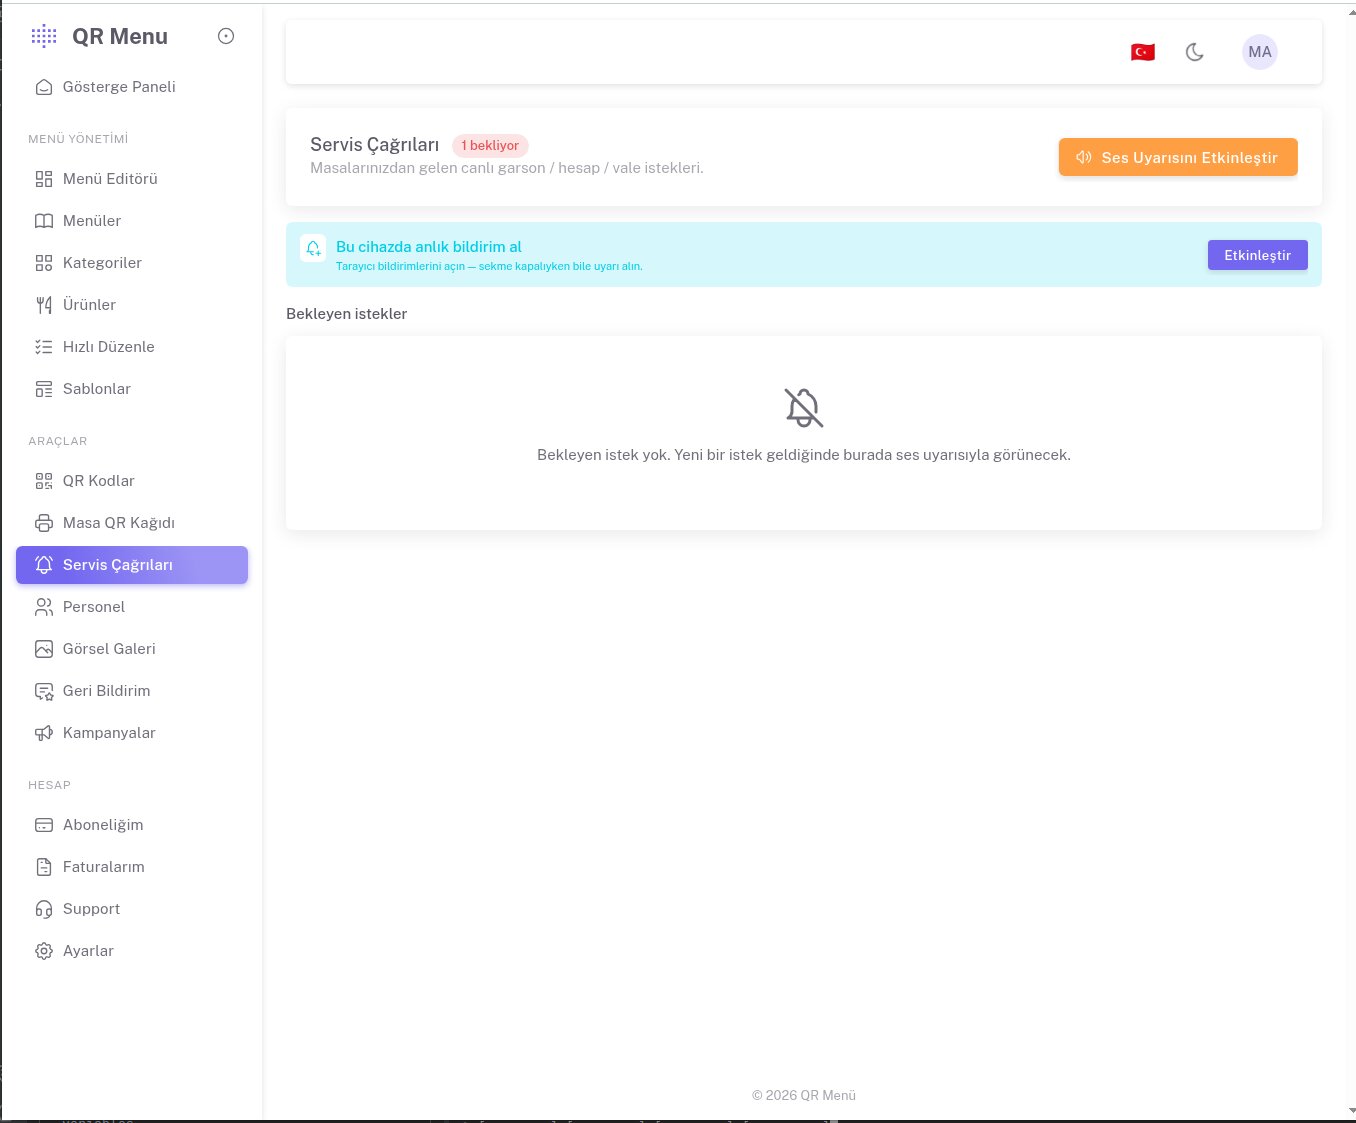
If you want your customers to be able to call a waiter or ask for the bill from the table, enable the Service Calls feature. When a customer taps the button in the menu, an instant notification reaches the staff phone:
Frequently asked questions
Do customers need to download an app?
No. The QR code opens the menu directly in the customer's browser. There's no app store, account creation or download requirement.
Do the QR codes change when I update prices?
No, the QR code stays the same. Only the price in the menu content changes; the customer sees the updated price on their next scan.
Can I have more than one menu?
Yes. For example, a "Breakfast Menu" and a "Dinner Menu" can be kept separately; each gets its own QR code.